Why Can My Mac Open My Photo Library
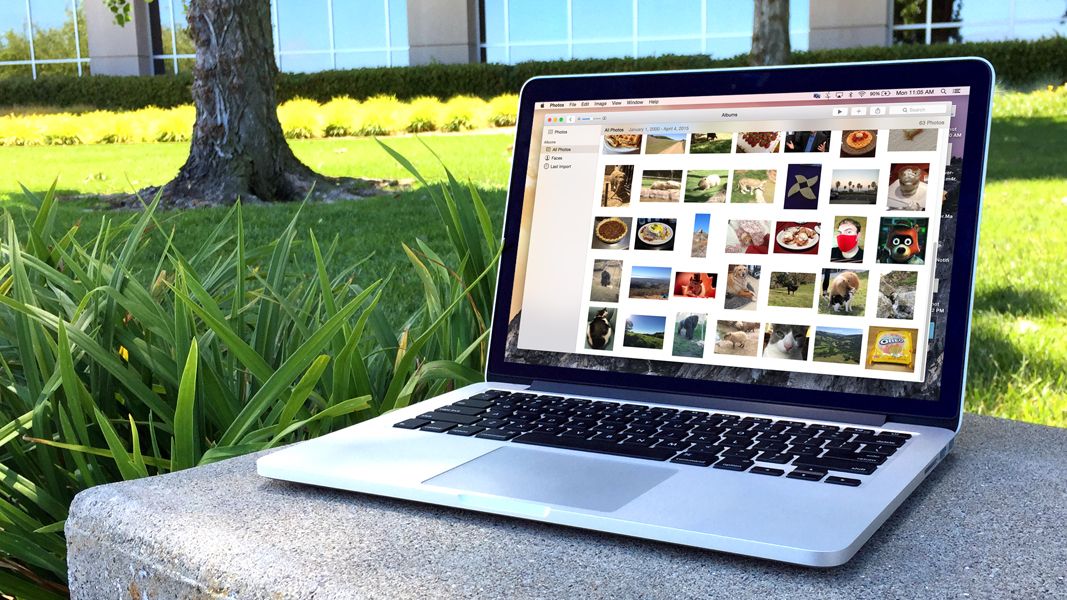
Photos in macOS Catalina has an immersive, dynamic look that showcases your best photos. Find the shots you’re looking for with powerful search options. Organize your collection into albums, or keep your photos organized automatically with smart albums. Perfect your images with intuitive built-in editing tools, or use your favorite photos apps. And with iCloud Photos, you can keep all your photos and videos stored in iCloud and up to date on your Mac, Apple TV, iPhone, iPad, and even your PC.
- How To Open Photo Library
- Why Can't I Open Photo Library On My Mac
- Why Can My Mac Open My Photo Library Free
- Why Can My Mac Open My Photo Library Download
How to Export Your Mac Photos Library. The first step in exporting your Mac Photos library is determining where your library resides on your hard drive. To do that, open Preferences in Photos: Look in the General section, where it says Library Location: Now, click on Show in Finder. Feb 28, 2018 Photos uses a Photos Library. If you do not change anything, the Photos Library will be in the Pictures folder. But some users move this library to an external drive to save storage on the system drive. This can be problematic, if the external drive has a wrong file system format. Jan 12, 2020 With either the desktop or a Finder window as the frontmost application, hold down the option key and select the Go menu. The Library folder will be listed as one of the items in the Go menu. Select Library and a Finder window will open showing the contents of the Library folder.
A smarter way to find your favorites.
Photos in macOS Catalina intelligently declutters and curates your photos and videos — so you can easily see your best memories.
Focus on your best shots.
Photos emphasizes the best shots in your library, hiding duplicates, receipts, and screenshots. Days, Months, and Years views organize your photos by when they were taken. Your best shots are highlighted with larger previews, and Live Photos and videos play automatically, bringing your library to life. Photos also highlights important moments like birthdays, anniversaries, and trips in the Months and Years views.
Your memories. Now playing.
Memories finds your best photos and videos and weaves them together into a memorable movie — complete with theme music, titles, and cinematic transitions — that you can personalize and share. So you can enjoy a curated collection of your trips, holidays, friends, family, pets, and more. And when you use iCloud Photos, all edits automatically sync to your other devices.
The moment you’re looking for, always at hand.
How To Open Photo Library
With Search, you can look for photos based on who’s in them or what’s in them — like strawberries or sunsets. Or combine search terms, like “beach 2017.” If you’re looking for photos you imported a couple of months ago, use the expanded import history to look back at each batch in chronological order. And in the My Albums tab, you’ll find your videos, selfies, panoramas, and other media types automatically organized into separate albums.
Fill your library, not your device.
iCloud Photos can help you make the most of the space on your Mac. When you choose “Optimize Mac Storage,” all your full‑resolution photos and videos are stored in iCloud in their original formats, with storage-saving versions kept on your Mac as space is needed. You can also optimize storage on your iPhone, iPad, and iPod touch, so you can access more photos and videos than ever before. You get 5GB of free storage in iCloud — and as your library grows, you have the option to choose a plan for up to 2TB.
Make an edit here, see it there. When you make changes on your Mac like editing a photo, marking a Favorite, or adding to an album, they’re kept up to date on your iPhone, your iPad, and iCloud.com. And vice versa — any changes made on your iOS or iPadOS devices are automatically reflected on your Mac.
Move my itunes library from mac to pc. Jan 04, 2020 Add Folder to Library Now it's time to move your iTunes content. Open the File menu in iTunes and click Add Folder to Library (Windows) or Add to Library (Mac). Mar 06, 2019 Transfer iTunes Library from Mac to PC. Open one of your other PC like Windows computer, and download the iTunes,and iMusic as well, launch iMusic, go to it's music icon on the left top corner, and then click the 'Add' icon on the right top corner to add the files from your iTunes file. Part 2: Free Way to Transfer iTunes Library from Mac to PC. There are a few ways to transfer your iTunes library from one computer to another: When you get a new Mac, use Setup Assistant (or Migration Assistant, if you’re switching from Windows) to move files—including your iTunes files—from your old computer to the new one. See the Apple Support article Back up and restore your iTunes Library. You can consolidate all the files in your library in the iTunes folder to make it easier to move your library to a new computer. In the iTunes app on your PC, choose File Library Organize Library. Select “Consolidate files.” Files remain in their original locations, and copies are placed in the iTunes folder.
All your photos on all your devices. iCloud Photos gives you access to your entire Mac photo and video library from all your devices. If you shoot a snapshot, slo-mo, or selfie on your iPhone, it’s automatically added to iCloud Photos — so it appears on your Mac, iOS and iPadOS devices, Apple TV, iCloud.com, and your PC. Even the photos and videos imported from your DSLR, GoPro, or drone to your Mac appear on all your iCloud Photos–enabled devices. And since your collection is organized the same way across your Apple devices, navigating your library always feels familiar.
Resize. Crop. Collage. Zoom. Warp. GIF. And more.
Create standout photos with a comprehensive set of powerful but easy-to-use editing tools. Instantly transform photos taken in Portrait mode with five different studio-quality lighting effects. Choose Enhance to improve your photo with just a click. Then use a filter to give it a new look. Or use Smart Sliders to quickly edit like a pro even if you’re a beginner. Markup lets you add text, shapes, sketches, or a signature to your images. And you can turn Live Photos into fun, short video loops to share. You can also make edits to photos using third-party app extensions like Pixelmator, or edit a photo in an app like Photoshop and save your changes to your Photos library.
- LightBrilliance, a slider in Light, automatically brightens dark areas and pulls in highlights to reveal hidden details and make your photo look richer and more vibrant.
- ColorMake your photo stand out by adjusting saturation, color contrast, and color cast.
- Black & WhiteAdd some drama by taking the color out. Fine-tune intensity and tone, or add grain for a film-quality black-and-white effect.
- White BalanceChoose between Neutral Gray, Skin Tone, and Temperature/Tint options to make colors in your photo warmer or cooler.
- CurvesMake fine-tuned contrast and color adjustments to your photos.
- LevelsAdjust midtones, highlights, and shadows to perfect the tonal balance in your photo.
- DefinitionIncrease image clarity by adjusting the definition slider.
- Selective ColorWant to make blues bluer or greens greener? Use Selective Color to bring out specific colors in your image.
- VignetteAdd shading to the edges of your photo to highlight a powerful moment.
- Editing ExtensionsDownload third-party editing extensions from the Mac App Store to add filters and texture effects, use retouching tools, reduce noise, and more.
- Reset AdjustmentsWhen you’ve made an edit, you can judge it against the original by clicking Compare. If you don’t like how it looks, you can reset your adjustments or revert to your original shot.
Bring even more life to your Live Photos. When you edit a Live Photo, the Loop effect can turn it into a continuous looping video that you can experience again and again. Try Bounce to play the action forward and backward. Or choose Long Exposure for a beautiful DSLR‑like effect to blur water or extend light trails. You can also trim, mute, and select a key photo for each Live Photo.
Add some fun filters.
With just a click, you can apply one of nine photo filters inspired by classic photography styles to your photos.
Share here, there, and everywhere.
Use the Share menu to easily share photos via Shared Albums and AirDrop. Or send photos to your favorite photo sharing destinations, such as Facebook and Twitter. You can also customize the menu and share directly to other compatible sites that offer sharing extensions.
Turn your pictures into projects.
Making high-quality projects and special gifts for loved ones is easier than ever with Photos. Create everything from gorgeous photo books to professionally framed gallery prints to stunning websites using third-party project extensions like Motif, Mimeo Photos, Shutterfly, ifolor, WhiteWall, Mpix, Fujifilm, and Wix.
We take a lot of photos with our iPhones and even DSLRs and other cameras. Photos are great for capturing memories with others, or when you just want to get a snapshot of something beautiful. Photos on Mac can help you keep all of your photos in one place, and even help you organize them.
How to add pictures and videos to albums
If you have a lot of photos and videos, one of the simplest and easiest ways to start organizing everything is to make use of albums, especially when you give them good names. And if you use iCloud Photo Library, all of your albums in Photos for Mac get synced to your iOS devices too.
Launch Photos on your Mac.
- Click on Photos in the sidebar, under the Library section.
Pick out the photos you want to add to an album, either new or existing.
- Hold down the command key on your Mac and click to select multiple photos.
- Right-click on your chosen photos and videos.
- Move the cursor to Add to.
You can choose an existing album, or create new album.
- If making a new album, give it a good, easy-to-remember name.
Optionally, you can make a new album at any time by clicking the + button that appears in the sidebar next to My Albums. Drag-and-drop the albums in whatever order you want to rearrange them in the sidebar.
How to organize albums and folders
When you have a lot of albums, it may be better to clean it all up by organizing albums into folders, which are like collections of albums. It's easy to do.
- Launch Photos on your Mac.
Either right-click on My Albums in the sidebar, or hover above and then click on the + button that appears next to My Albums.
May 30, 2019 Despite the fact that Apple keeps the Mac Library folder hidden from users, it’s good to learn how to show the Library folder on Mac. You may need to access the Library folder when you need to clear cache, remove the app’s leftovers, edit preference files manually, etc. In this article, we explain how to find the Library folder on Mac. If you don’t know why you’re doing something to a folder (other than the Fonts folder) in your Home/Library, don’t do it. There must be some good reasons why Apple decided to hide the Home/Library folder in OS X Yosemite, and one of them is to keep you from accidentally screwing something up.
 How to view the /Library folder in Mavericks and Yosemite. Today's Best Tech Deals. Perhaps you wanted to tweak something using a tip from Macworld, Mac OS X Hints, or elsewhere on the Web. Oct 01, 2016 Yosemite 10.10.5 (and previous) Finder will not find User Library Files. Nehalem Mac Pro 2009,2010,2012 (multiple). Details: I have used EVERY means to. Jan 12, 2020 You can access the hidden Library folder without using Terminal, which has the side effect of revealing every hidden file on your Mac. This method will only make the Library folder visible, and only for as long as you keep the Finder window for the Library folder open.
- Click New Folder.
Give your folder a name.
Drag the albums that you want into that folder.
How to use Smart Albums
Smart Albums are like regular albums, but smarter, obviously. They're great for helping you quickly organize images without the need of manually adding each one to an album because it's all automated.
- Launch Photos on your Mac.
Right-click on My Albums or click the + button that appears next to My Albums.
- Select New Smart Album.
- Give your Smart Album a name.
Choose the parameters for your Smart Album.
Click OK to confirm.
Smart Albums have a large number of different parameters, such as photos, faces, aperture, ISO, Live Photo, RAW, Portrait, and more. With all of these options, you can create many different Smart Albums to suit whatever it is you need.
If you're not satisfied with the Smart Album, you can always tweak the settings by clicking on the gear icon that's next to the Smart Album's title, then re-select the parameters you want to use.
Unfortunately, Smart Albums do not sync to your other devices through iCloud Photo Library, as they're only available on your Mac.
How to navigate Photos for Mac faster with the sidebar
The Sidebar in Photos is a great way to quickly jump between various areas in Photos quickly and easily. Plus, it helps you find albums that may otherwise be hidden, so this was a design choice made by Apple.
However, if you are running macOS Sierra and older, you can actually hide or unhide the sidebar as you wish.
- Launch Photos on your Mac.
- Click on View in the menu bar.
- Select Show Sidebar in the menu.
- The sidebar will appear on the left side of the screen.
Follow the steps above to hide it (make sure Show Sidebar is unchecked).
How to navigate moments, collections, and year views in macOS Mojave and earlier
One of the coolest things about Photos is that it intelligently groups all of your photos and videos into moments, collections, and years.
This means that your photos appear in a timeline and are grouped by things like location, or even event. It's a great way to take a look back at your memories and relive those specific moments in time.
The Moments, Collections, and Year views are only available in macOS Mojave and older.
- Launch Photos on your Mac.
- Make sure that you're in the Photos view from the sidebar.
Click on Photos, Moments, Collections, or Years buttons at the top of the window.
Click on a section of a Year to move to that Collection, or a section of a Collection to drill down into that Moment, or an item in a Moment to view that image or video in closer detail.
- You can also use your keyboard's arrow keys to move between photos and videos in a Moment.
A single click on an item selects it, while a double click takes you to view it.
In the Year and Collections views, thumbnails can be small. You can click-and-hold and then drag the cursor in any direction over the thumbnails to get a larger preview. Letting go will take you directly to the image that the cursor was last on.
How to navigate through Years, Months, and Days in macOS Catalina
To replace the previous Moments/Collections/Years view, Catalina changed it to Years, Months, and Days for simplicity.
- Launch Photos on your Mac.
Make sure you're in the Photos section in the sidebar.
Source: iMore
Click the Years, Months, or Days buttons at the top of the window. The default view is All Photos.
Clicking on Years lets you see each year as a block. Double-clicking the year takes you into Months.
When you double-click on a Month, you'll drill down into the Days view.
How to create a new library with Photos for Mac
You can create a new library for your photos at any time with Photos for Mac. To do so, make sure that you quit Photos and reopen it with the following method to get the Library options.
- Hold down the Option key on your keyboard.
- Double-click on Photos on your Mac.
- Click on the Create New button in the Choose Library window.
- Name your Library.
Click OK.
You've now created a brand new Photos Library. Unfortunately, there is no easy way to migrate over photos and video, so you will need to export the content you want, and then import it back into the new library.
Why Can't I Open Photo Library On My Mac
How to switch between Libraries in Photos for Mac
When you create a new library, you may still want to go back to a previous library for something. Fortunately, it's easy to switch between multiple libraries.
- Make sure that Photos is not open (quit if it is).
- Hold down the Option key on your keyboard.
- Double-click on Photos.
Click on the name of the library you want to open.
Voilá! Just make sure to repeat this process each time you want to switch to a different Photo library.
How to move your Photos library to an external hard drive
If you're low on storage space on your Mac, you can just move your Photos Library to an external hard drive. Keep in mind though, that you will need to have this external drive plugged in to access your Photos Library, even if you have iCloud Photo Library enabled. And you aren't able to create a second Photos Library that has iCloud Photo Library enabled on your Mac, so be wary.
- Launch a Finder window on your Mac.
- Click on the Mac hard drive (Macintosh HD) in the sidebar.
- Double-click on the Users folder.
- Double-click on your username.
- Double-click on your Pictures folder.
Click on the Photos Library file and then drag it to your external hard drive in the sidebar.
This process may take a while, depending on how big your Photos library is.
A note on reference libraries
The Photos app technically supports the management of images that aren't locally stored within its library — that is, you can keep a set of images in a folder called 'October Trip' and manage them within Photos without having to make a separate copy of them. You can do this by navigating to Photos > Preferences from the menu bar, selecting the General tab, and unchecking the 'Copy items to the Photos library' box under Importing.
That said, reference libraries won't play nicely with iCloud Photo Library users; you may run into problems when syncing, or not be able to sync at all. So if you plan on using a reference library, you'll have to opt out of iCloud Photo Library.
I also didn't have any luck getting referenced files to sync properly with Photos — I'd delete a photo, but the reference file would stay in its original location, even after deleting it from the 'Recently Deleted' folder. Not sure if that's a bug or just not how Photos wants us managing referenced photos, but worth noting.
Questions?
Sound off in the comments below!
October 2019: Updated for macOS Catalina.
Photos for Mac
Main
Why Can My Mac Open My Photo Library Free
🍎 ❤️Apple reminds us all that 'creativity goes on' in new YouTube video
Why Can My Mac Open My Photo Library Download
Apple's latest YouTube video knows just how to tug at the heartstrings.